This post shares you with a guide about how to use Launch X431 Diagun. As the 4 generation of x 431 diagun,
this one Diagun IV could use directly without IP limit. It is a useful
tool which supports over 20 easy-changeable language as well as new 11
special functions added.
This post will show like this:
1.How to register and activate Launch X431 Diagun IV?
2.How to Connect/Disconnect Diagun IV WiFi?
3.How to set up X431 Diagun IV Bluetooth?
How to register and activate Launch X431 Diagun IV?
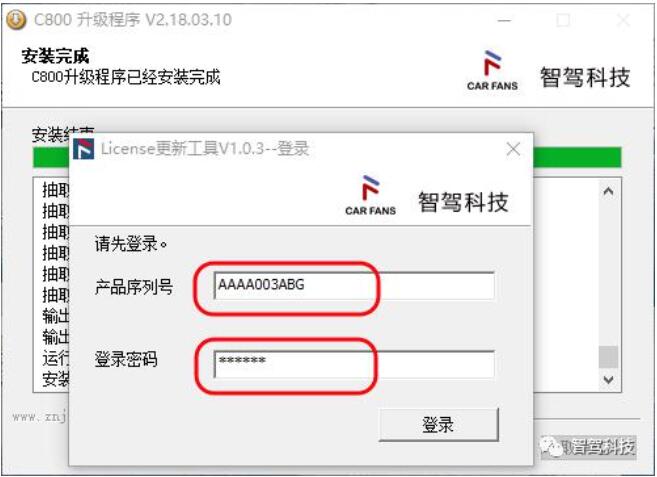
User registration
Tap “Login” in the upper right corner of the main menu screen:

If you are a new user, tap “New Registration”.
Note: To obtain better service, you need to provide real information.
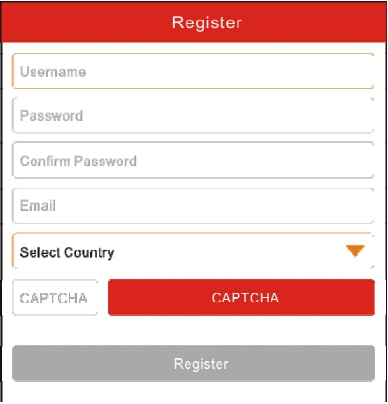
1.Create App account: In Image 3, fill in the information in each
field and then tap “Register”, a screen similar to the following will
appear:
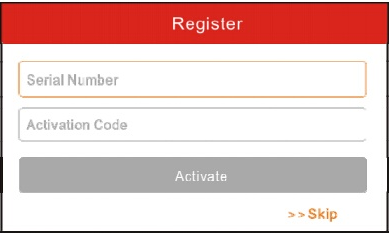
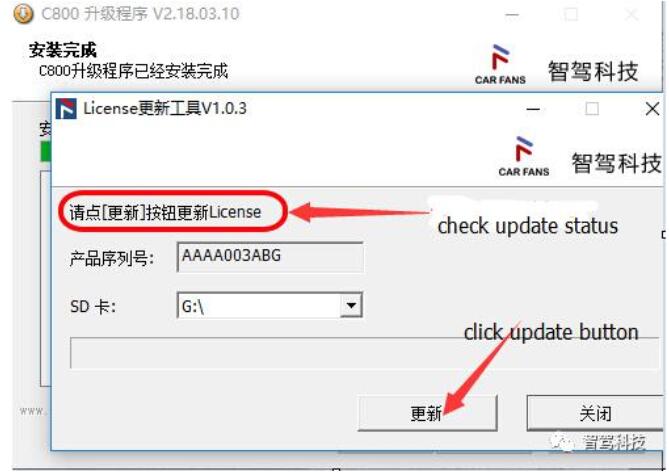
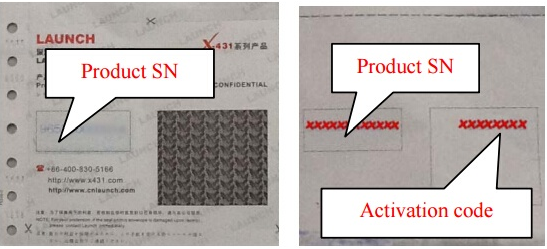
2.Activate the VCI connector: In Image 4, input the Serial Number and
Activation Code, which can be found in the password envelope.
Note: To exit and activate it later, tap “Skip”. In this case, you
can activate your connector by tapping “Activate Connector” in “Personal
Center”.
Activate Connector.
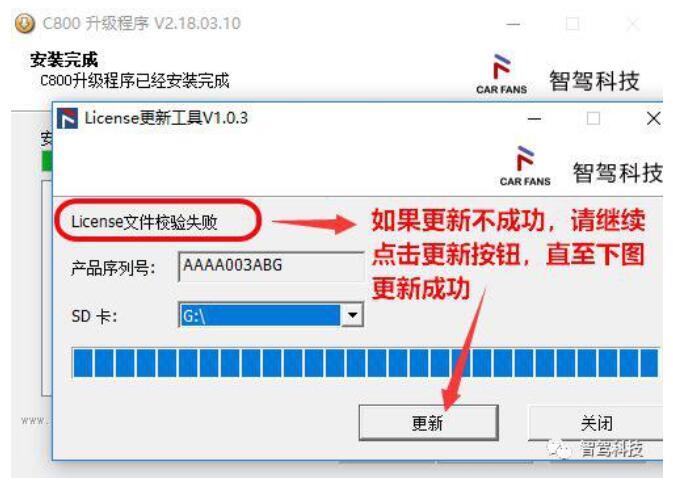
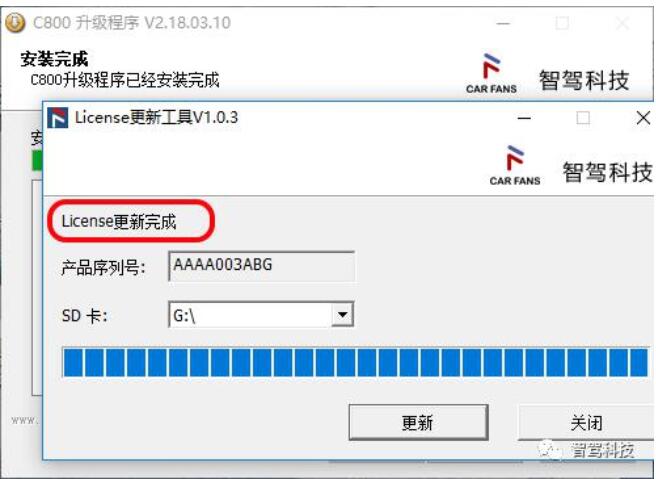
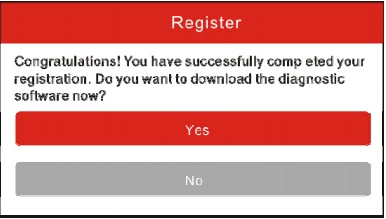
Download diagnostic software: Tap “Activate”, a dialog box similar to Image 5 will appear:
To download the diagnostic software, tap “Yes” to enter the software
download page. Tap “No” to download it later. On the download page, tap
“Update” to start downloading. It may take several minutes to finish it,
please be patient to wait. To pause downloading, tap “Pause”. To resume
it, tap “Continue”. Once the download is complete, the system will
install the software package automatically.
If you have registered to be a member, input your name and password,
and then tap the “Login” button to enter the main menu screen directly.
Note: launch x431 scan tool
Diagun IV has an auto-save function. Once the username and password are
correctly entered, the system will automatically store it. Next time
you login the system, you will not be asked to input the account
manually.
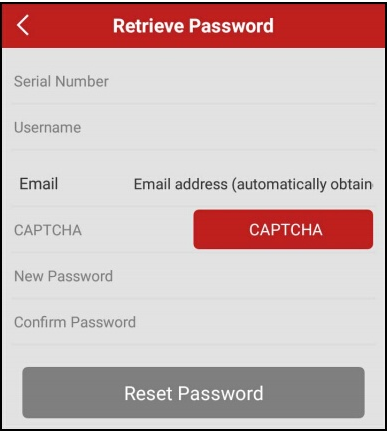
If you forgot the password, tap “Retrieve Password”, and then follow the on-screen instructions to retrieve it.
How to Connect/Disconnect X431 Diagun IV WiFi?
Note: If you don’t need to use Wi-Fi for a while, you can turn it off to conserve battery life.
X-431 Diagun IV has built-in Wi-Fi that can be used to get online.
Once you’re online, you can register your X-431 Diagun IV, surf the
Internet, get apps, send email, launch the remote diagnosis, and check
for software updates etc.
1.Connect to a Wi-Fi network
1).On the home screen, tap Settings -> WLAN.
2).Slide the Wi-Fi switch to ON, X-431 Diagun IV will start searching for available wireless networks.
3).Select a wireless network, y If the chosen network is open, X-431
Diagun IV will connect automatically; y If the selected network is
encrypted, a network password will need to be entered. 4).When
“Connected” appears, it indicates the Wi-Fi connection is complete.
Note: When Wi-Fi is not required, this should be disabled to conserve
battery power. Once it is connected successfully, tap the Wi-Fi network
from the list to view its name, link speed, security type, IP address
etc. When this tool is in range, it will connect to the previously
linked network automatically.
2.Disconnect from a Wi-Fi network
1).On the home screen, tap Settings -> WLAN.
2).Tap the network with a Connected status, then tap “Disconnect”.
How to set up X431 Diagun IV Bluetooth?
Enter X-431 Diagun IV Bluetooth setting screen (“Settings” ->
“Bluetooth”), slide the Bluetooth switch to ON and X-431 Diagun IV will
start searching available Bluetooth device, tap the desired connector to
pair. By default, the Bluetooth name is 98729*****00 (where *****
stands for 5 digits.).
Note: In case no Bluetooth setting is done before diagnostic software
is launched, you can also configure it while using the software.